

Table of contents
Docker Volumes
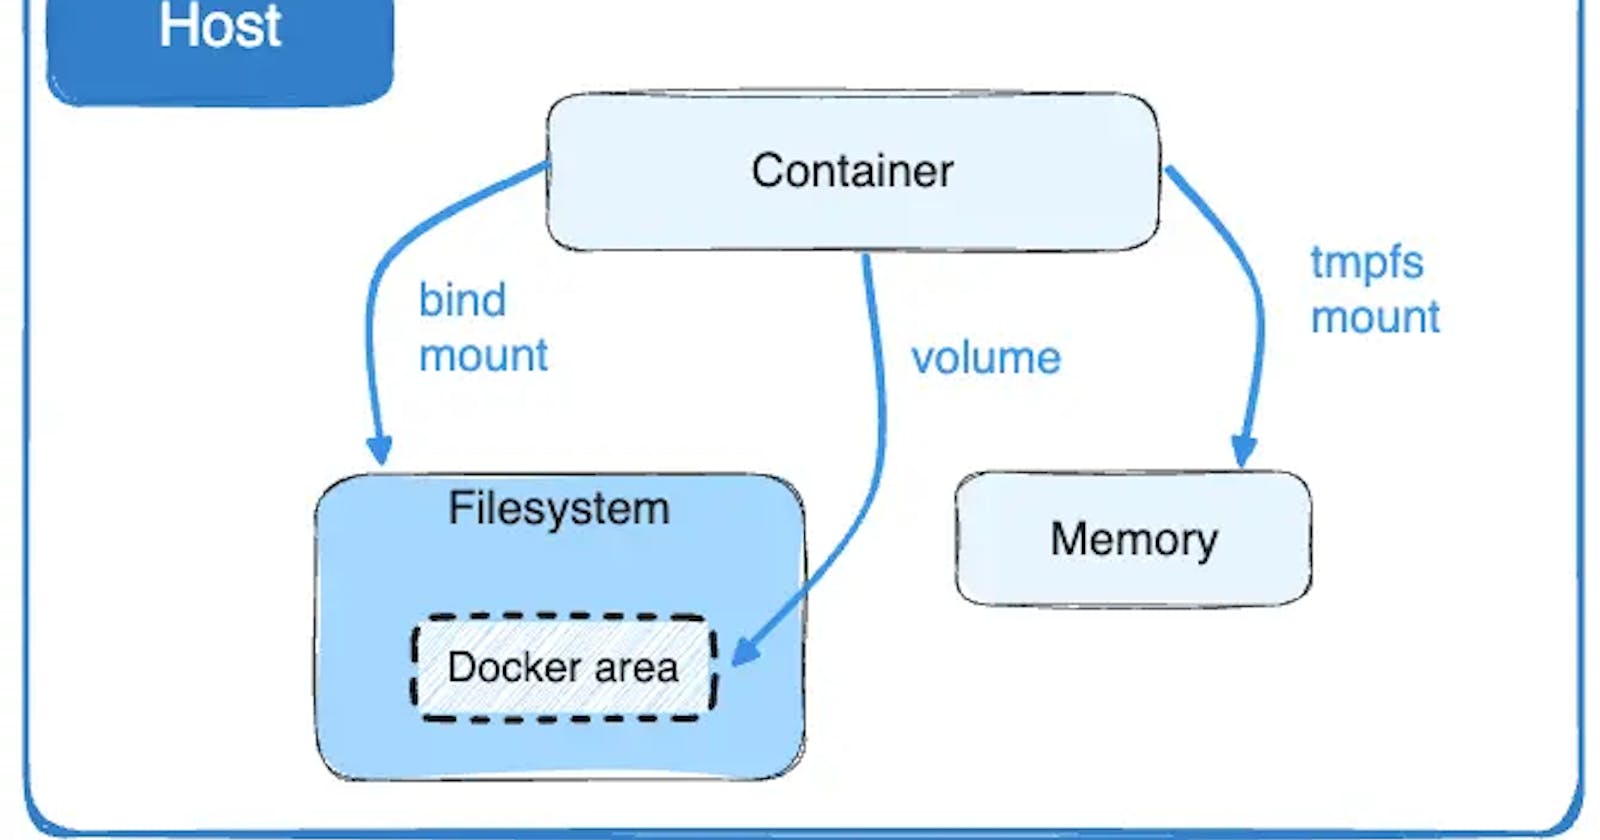
When developing an application, a crucial aspect is to utilize operations that interact with a filesystem. Those operations can be driven by data storage purposes or, in some cases, might be configuration driven. For example, take a database application that needs a filesystem to operate and store data. The same also applies to configurations that apply to an application. Let’s imagine a JEE application that is heavy on XML configuration. It needs to be able to read and store data inside a filesystem. The issue with disk operations on a Docker container is that once the container is shut down, all of the changes will be lost. In this case, Docker provides us with volumes. Volumes are the preferred mechanism for persisting data that is generated and used by a container.
Here is a list of some of the characteristics of volumes:
• Volumes and their data can remain after a container has been deleted.
• A volume can be attached to another container.
• Volumes can be used by more than one container simultaneously.
• Volumes are abstract.
• Volumes can be local or remote.
Shared Volume
When building fault-tolerant applications, you may need to configure multiple replicas of the same service to have access to the same files.
There are several ways to achieve this when developing your applications. One is to add logic to your application to store files on a cloud object storage system like Amazon S3. Another is to create volumes with a driver that supports writing files to an external storage system like NFS or Amazon S3.
Docker volume drivers
Volume drivers can enable interactions with a remote filesystem and persist data. Available drivers include Azure File Storage, NFS, and AWS EFS.
Apart from highlighting the feature of interacting with a volume on a remote host, a volume driver can be used to add extra functionality when storing data; for example, by adding a form of proprietary encryption in transit or storage.
Bind Mounts
Bind mounts are another way to give containers access to files and folders on your host. They directly mount a host directory into your container. Any changes made to the directory will be reflected on both sides of the mount, whether the modification originates from the host or within the container.
Bind mounts are best used for ad-hoc storage on a short-term basis. They’re convenient in development workflows. For example: bind mounting your working directory into a container automatically synchronizes your source code files, allowing you to immediately test changes without rebuilding your Docker image.
services:
  example_service:
    image: example_image
    volumes:
      - <host_directory>:<container_directory>:<access_mode>
Access Modes
| mode | Description |
shared | Sub-mounts of the original mount are exposed to replica mounts, and sub-mounts of replica mounts are also propagated to the original mount. |
slave | similar to a shared mount, but only in one direction. If the original mount exposes a sub-mount, the replica mount can see it. However, if the replica mount exposes a sub-mount, the original mount cannot see it. |
private | The mount is private. Sub-mounts within it are not exposed to replica mounts, and sub-mounts of replica mounts are not exposed to the original mount. |
rshared | The same as shared, but the propagation also extends to and from mount points nested within any of the original or replica mount points. |
rslave | The same as slave, but the propagation also extends to and from mount points nested within any of the original or replica mount points. |
rprivate | The default. The same as private, meaning that no mount points anywhere within the original or replica mount points propagate in either direction. |
tmpfs mounts
tmpfs mounts are temporary. They are stored in the host system’s memory only and are never written to the host system’s file system. If your container generates non-persistent state data, consider using a tmpfs mount to avoid storing the data anywhere permanently and increase the container’s performance by avoiding writing into the container’s writable layer. This option can be used for keeping sensitive data during execution.
Create volume using docker commands
#We can create docker volumne using
docker volume create example-volume
#attach volumne to container
docker run -it --rm --name example-volume-container --mount source=example-volume,target=/storage bash
Create volume using docker-compose file
Volumes on Compose are defined in the volumes sections. We can use configuration options to volumes section. for example, a driver that is configured to use nfs:
services:
    nginx:
     image: nginx
    volumes:
     - nfsvol:/data
volumes:
     nfsvol:
         driver_opts:
         type: "nfs"
         o: "addr=127.0.0.1,nolock,rw"
         device: ":/data"
Networking in Docker-Compose
The containers running on Docker communicate and interact transparently. Thanks to the network layer, Docker provides various networking aspects that are tackled efficiently, as follows:
• Private networks
• Internal DNS
• Container communication
• Bridging containers
The following network drivers are available by default, and provide core networking functionality:
• Bridge : a bridge network uses a software bridge which lets containers connected to the same bridge network communicate, while providing isolation from containers that aren't connected to that bridge network.
• Host : By using the Docker host, the container is not isolated from it. The container does not have its own IP address. The container will be accessed using the host IP.
• Overlay : Using Docker on a production with an orchestration engine such as Swarm requires the use of multiple hosts. The overlay network creates a distributed network among those hosts. An overlay network will transparently join the host networks and create a unified network on top of them.
• ipvlan : IPvlan networks provide full control over both IPv4 and IPv6 addressing.
• macvlan : Assign a MAC address to a container.
User-Defined Network
You can create custom, user-defined networks, and connect multiple containers to the same network. Once connected to a user-defined network, containers can communicate with each other using container IP addresses or container names.
Instead of just using the default app network, you can specify your own networks with the top-level networks key. This lets you create more complex topologies and specify custom network drivers and options. You can also use it to connect services to externally-created networks which aren't managed by Compose.
Create network using docker Commands
#Create network
docker network create -d bridge my-net
#List available networks
docker network ls
Using Docker-Compose
services:
  proxy:
    build: ./proxy
    networks:
      - frontend
  app:
    build: ./app
    networks:
      - frontend
      - backend
  db:
    image: postgres
    networks:
      - backend

networks:
  frontend:
    # Use a custom driver
    driver: custom-driver-1
  backend:
    # Use a custom driver which takes special options
    driver: custom-driver-2
    driver_opts:
      foo: "1"
      bar: "2"
Use-Case
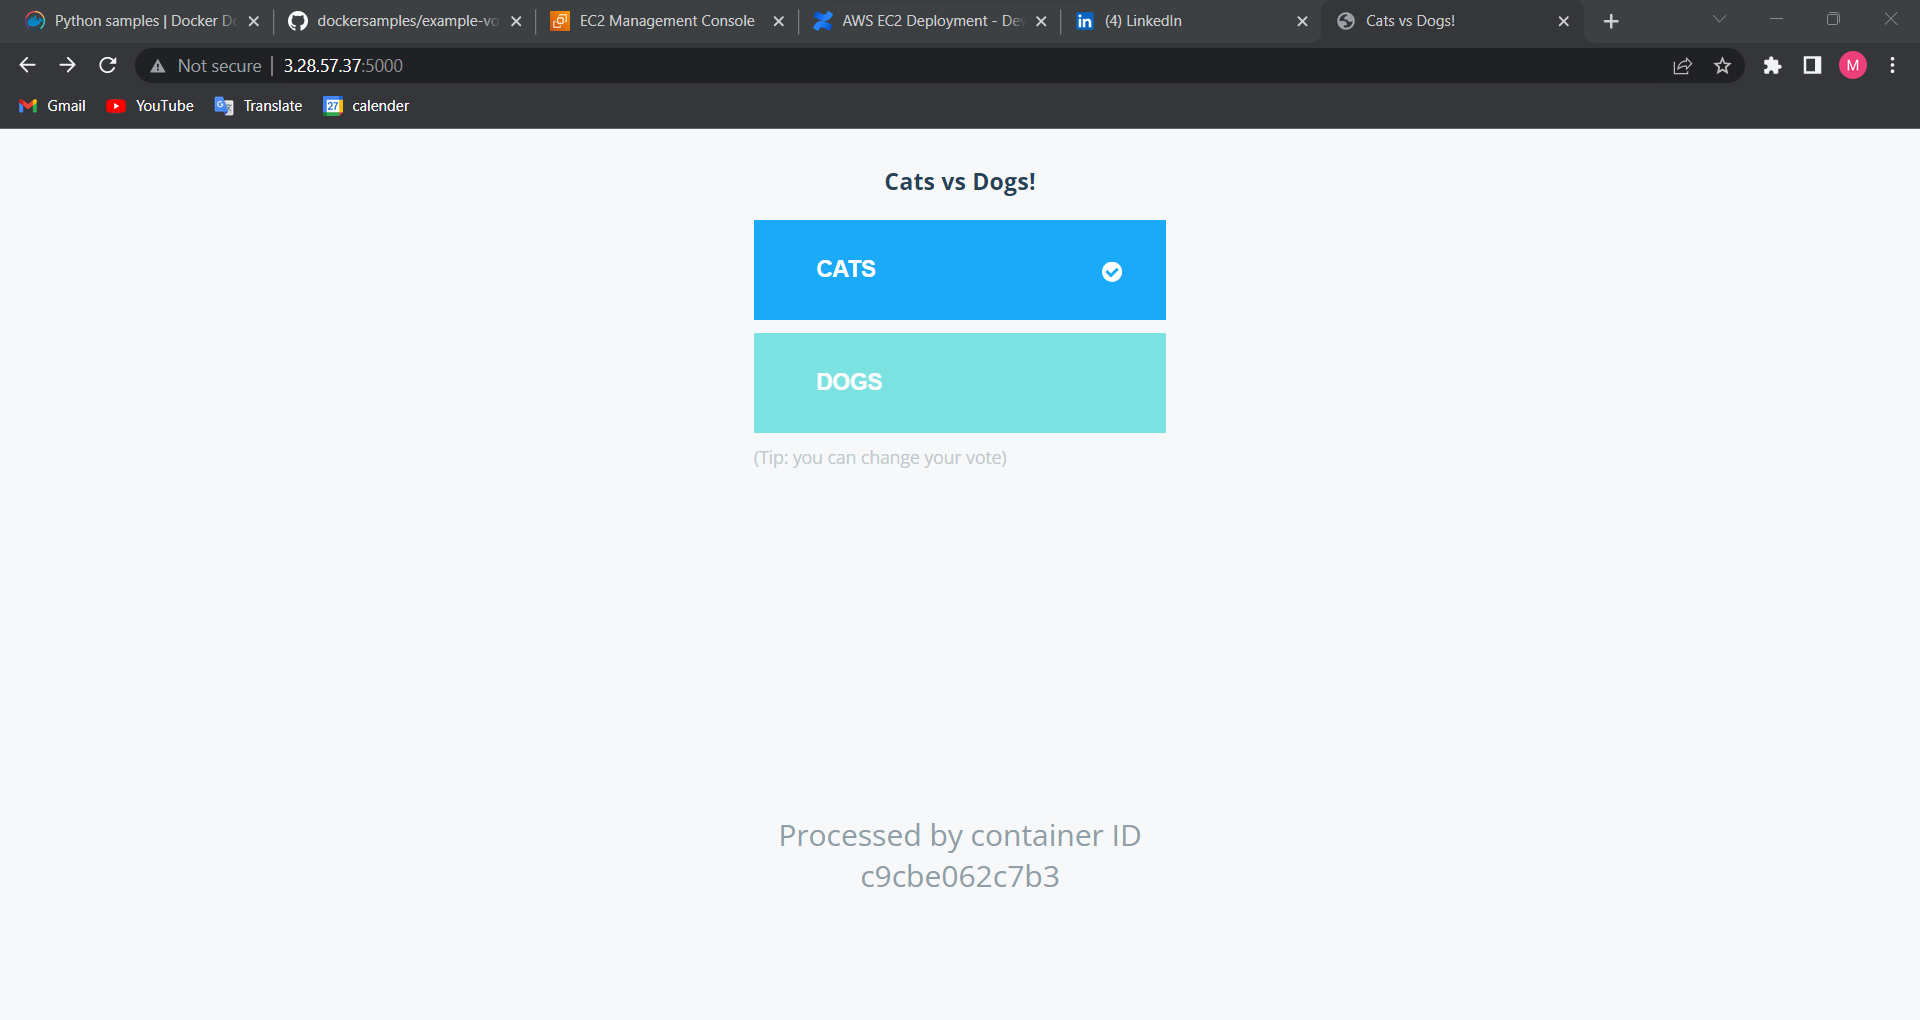
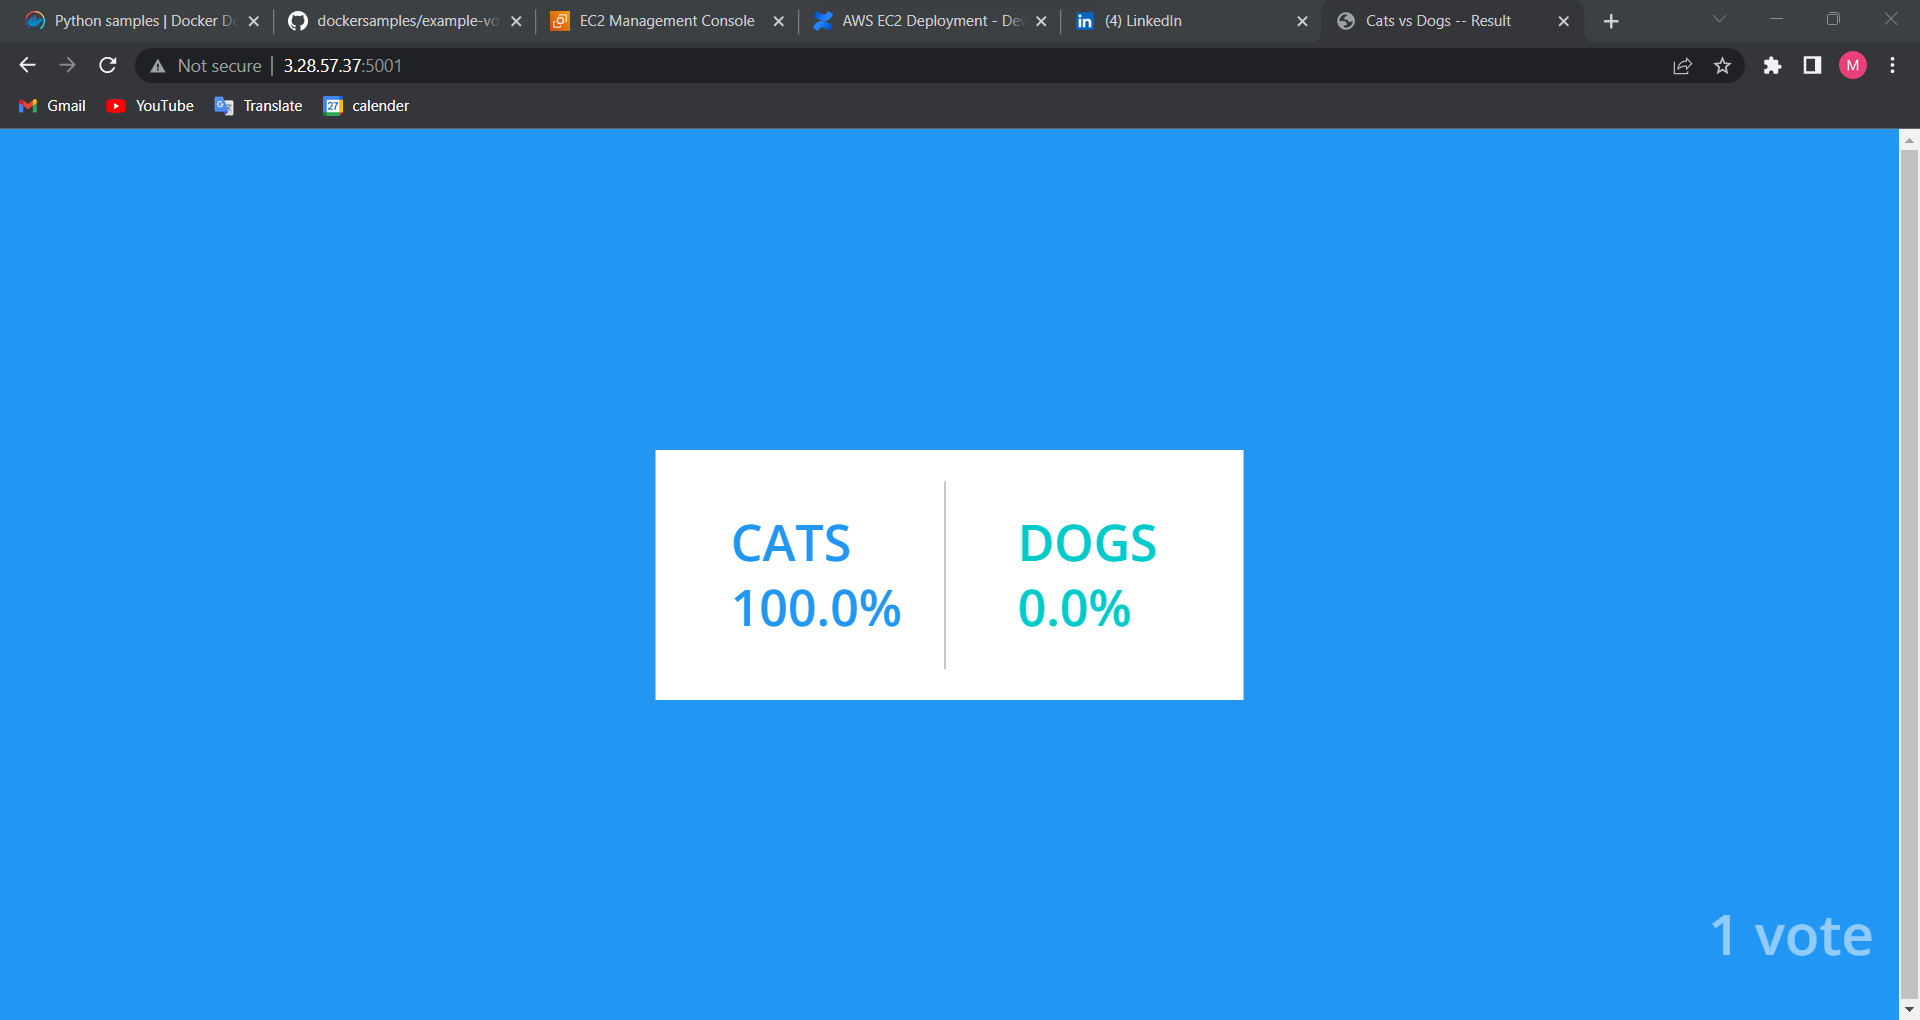
Deploying example voting app using docker compose volumes and networks.
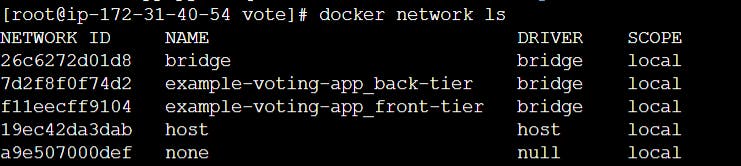
Networks:
In this application there are two custom networks front-tier and back-tier . There are multiple containers vote , result , worker, redis, and db. vote and result container can talk to both networks but worker , redis and db can talk to back-tier network.
Volumes:
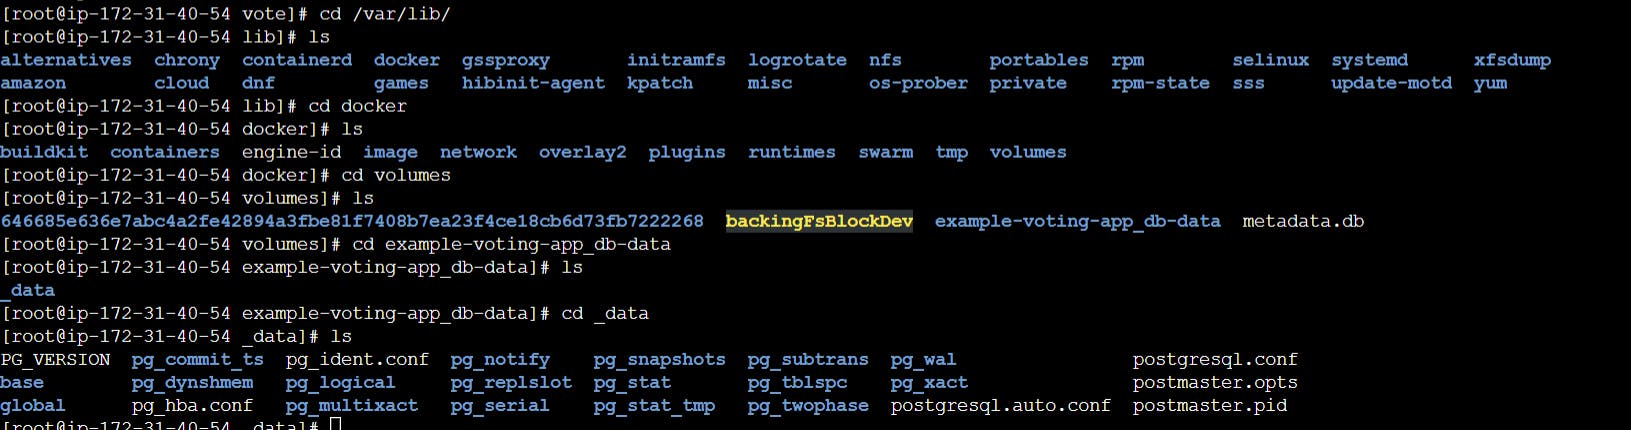
In this application there is custom volume db-data created. postgres db data will be stored on db-data volume. vote and result app data will be stored on volume specified.
Deploy using docker-compose
clone the repo at current directory
git clone git@github.com:dockersamples/example-voting-app.git
Navigate to repo project folder.
cd example-voting-app
Run docker-compose command to build and run multiple containers for voting app
docker-compose up -d
List and Inspect docker volumes
docker volume ls
docker inspect $(docker volume ls)
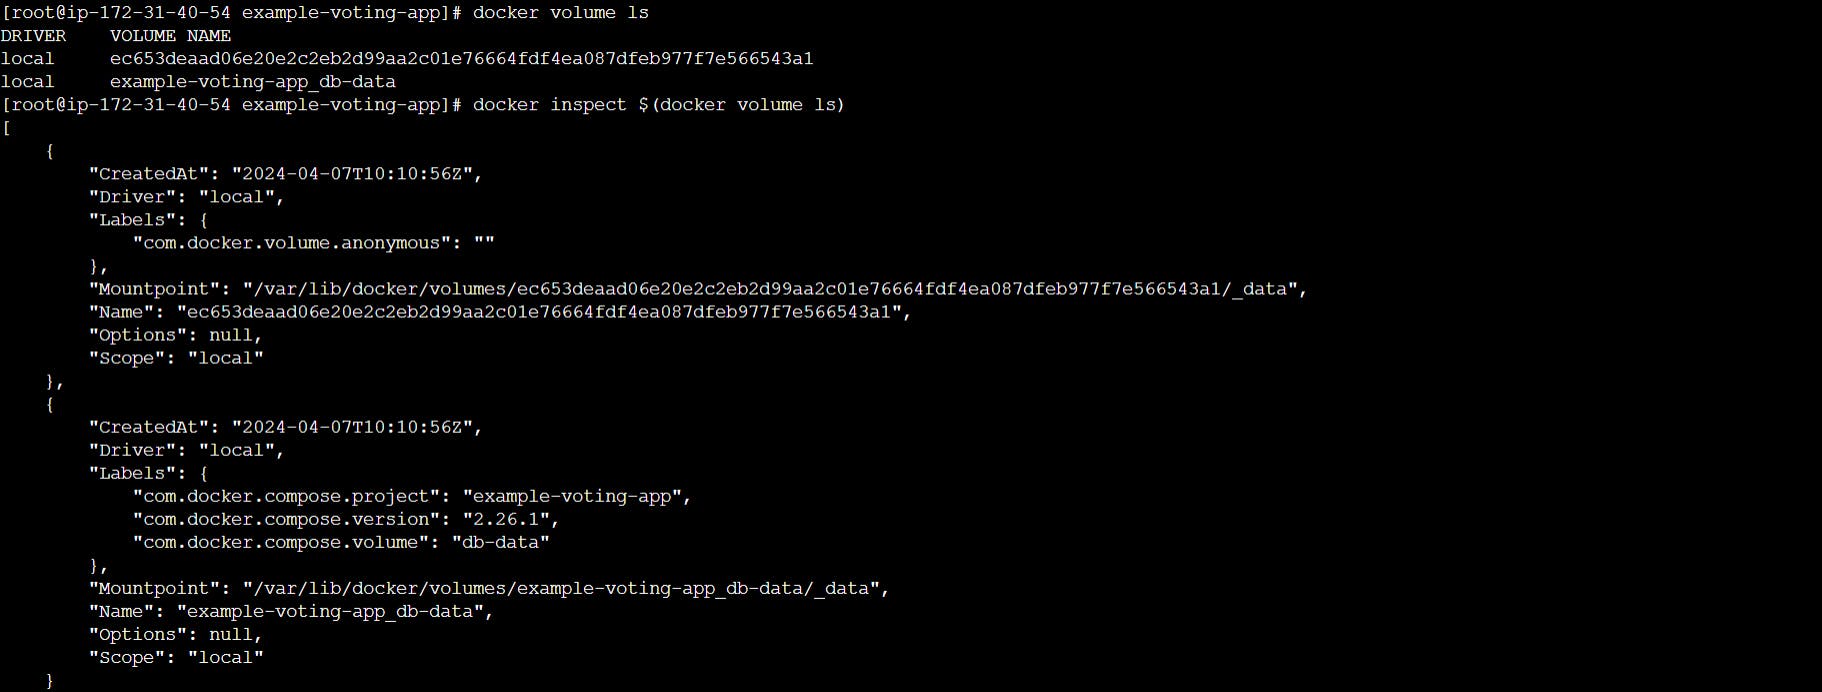
We can see custom volume created in /var/lib/docker/volumes folder
We can remove docker volume using
docker volume rm $(docker volume ls -q)
List and Inspect docker networks
We can inspect docker networks using
docker inspect $(docker network ls)
docker network rm $(docker network ls -q)